How to make a money rose
This past June, my mom wanted to buy me some flowers for my graduation but the catch was that I had to choose my own bouquet. I looked around both on and offline, but I couldn't really find anything that I wanted to carry around on my graduation day. I thought briefly about taking the easy way out and ordering an orchid lei from Hawaii so that my hands would be free, but those cost about $75 to ship to Canada overnight by FedEx. I couldn't justify spending that much on something that would be thrown away in less than a week.
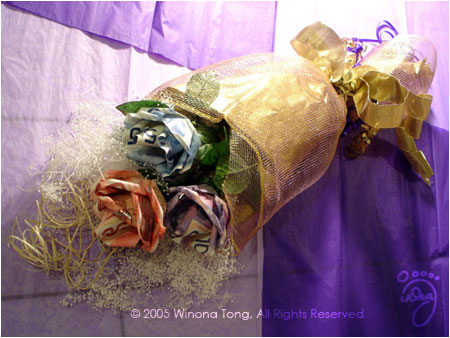
I never really liked flowers, especially cut flowers. They seem so pointless; so expensive, yet so temporal. So in my tradition of making fashion statements, I made a bouquet out of Canadian $5, $10 and $50 bills. This bouquet may cost many times more than a fresh bouquet (depending on the denominations of the bills you use) but it will last forever. If you ever grow tired of it, you can even disassemble it and spend it on something more practical.
Adapted from Dollar Bill Rose by Susan from Craft at Home, here are my refined step-by-step instructions on how to make a long stemmed rose out of money.
1. Materials

- 1 silk flower with removable leaves and plastic calyx (circle of leaves beneath petals)
- 1 metre of floral tape
- 2 floral stem wires about 50 cm long (one should be 18 or 20 gauge, the other should be 22 or 24 gauge)
- 1 pair of longnose pliers
- 1 pair of linesman pliers (or anything rigid with a small flat surface)
- 5 crisp bills (the newer the better) Not shown:
- anything adhesive (glue, tape)
- any flat, rigid surface (pile of magazines on a table, cutting board)
2. Preparing the petals
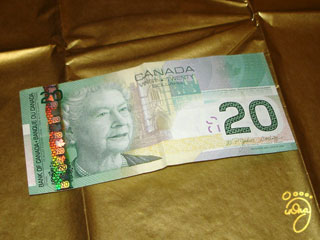 |
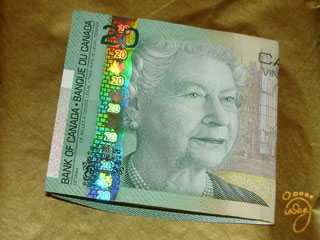
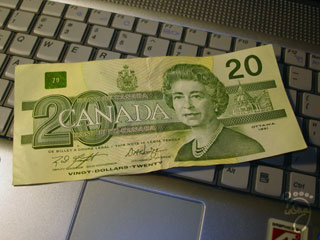
Become acquainted with the Canadian 20 dollar bill. I will be using this type of bill in the tutorial. It is not necessary for you to follow my choice of bill orientation exactly, but it will help in following my folding instructions if you know what I mean when I refer to the "front" or the "back" of the bill. This is the front. |
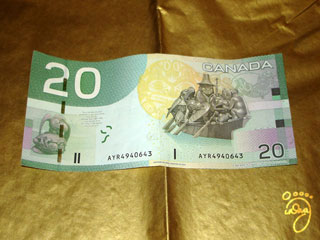 |
This is the back. |
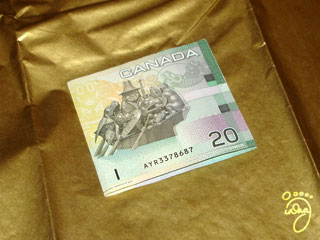 |
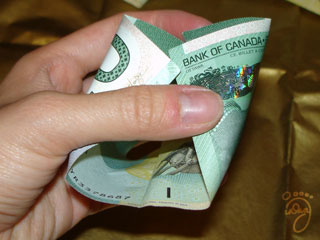
1. Fold bill in half with its back side facing outwards. |
 |
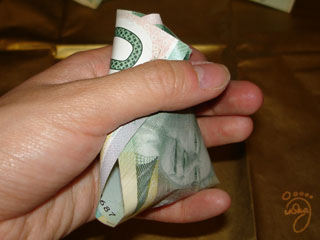
2. Lay the bill flat again with the back facing upwards. By rolling the corners tightly around one end of the thicker (18 or 20 gauge) wire, curl all 4 corners tightly upwards at approximately 45 degrees to the edges of the bill until the curls meet in the middle of the short sides of the bill. |
 |
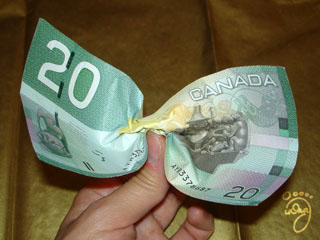
3. Make a small crease in the centre of the bill, perpendicular to the fold made in step 1. Do not fold the bill all the way lengthwise! |
 |
4. Pinch the crease from the bottom. |
 |
5. Crumple the middle of the bill by folding only the middle part like a fan, making sure that the 2 long edges point upwards, so that the front of the bill forms the inside of 2 cup-like shapes. |
 |
6. Flatten the creases in the middle of the bill, while still keeping the middle gathered together to make the cups more rounded. |
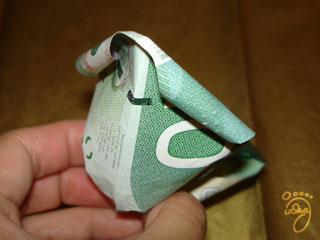 |
This is an alternate view of what the cups should look like. |
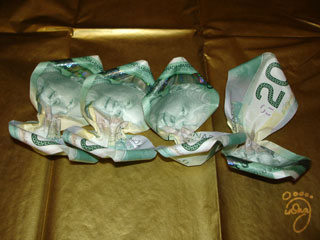 |
7. Repeat steps 1 - 6, three more times to make 4 pairs of petals in total. |
 |
8. Fold the last bill in half with the front facing outwards. |
 |
9. Lightly cup the bill in one hand with the front facing outwards. |
 |
10. Squeeze the bill a bit tighter to slightly curl the edges. This bill will form the unopened petals in the middle of the rose. |
 |
11. Similar to steps 3 - 5, crumple the middle of the bill by folding only the middle part like a fan, making sure that the 2 long edges point upwards. Now all the petals are ready to be assembled. |
3. Assembling the petals
 |
12. Take the thinner floral stem wire (22 or 24 gauge) and bend it in half. Take the bill with no tightly curled corners (the one created in steps 8 - 11) and put it between the wire with the inside of the cup facing the bend in the wire, and the pinched sides straddling the 2 ends of the folded wire as shown. |
 |
13. Push the crumpled part of the bill tightly into the bend in the wire. |
 |
14. Bend the wires tightly around the crumpled centre so that they cross beneath the cup |
 |
15. Intertwine the crossed wires by giving them a 90 degree twist. Take note of the direction in which you have twisted the wires. The wires should be twisted in the same direction in future steps. In this example, I have twisted them in a clockwise direction when looking up from the bottom of the flower. |
 |
16. Using the longnose pliers, bend the wires back upright with about a 1 cm gap between the 2 crossed wires. |
 |
17. Take one of the curled petals and place it between the 2 wires with the cup facing upwards. |
 |
18. Tightly push the middle of the curled bill flat against the middle of the uncurled bill. |
 |
19. Fold down and cross the wires beneath the cup as in step 14. |
 |
20. Intertwine the crossed wires by giving them a 90 degree twist as in step 15. |
 |
21. On a protected flat surface (pile of magazines on a table, cutting board) flatten the crossings of the wires by pushing the tip of the linesman pliers down on the crumpled centre portion of the flower. If you do not have lineman pliers, they can be substituted using anything rigid with a small flat surface, like a roll of dimes. |
 |
22. Repeat steps 16 - 21, three more times using the 3 remaining curled petals. |
 |
23. Using your fingers, bend the wires back upright, this time with no gap between the crossed wires. |
 |
24. Continue twisting the wires until the two ends are fully intertwined. |
 |
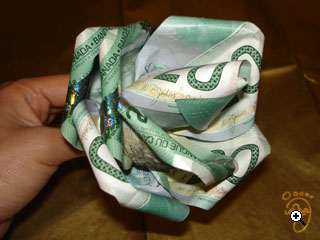
This is what the flower should look like after step 24 has been completed. |
4. Adding the finishing touches
 |
25. Roll one of the uncurled centre petals into a point and hold it in place using glue or tape. |
 |
26. Roll the second uncurled petal around the first point created in the previous step and glue or tape it into position. |
 |
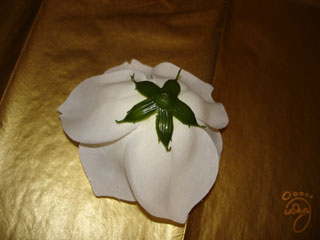
27. Dismantle the silk flower |
 |
... by pulling off the leaves |
 |
... plucking off the bloom |
 |
... and removing the calyx. |
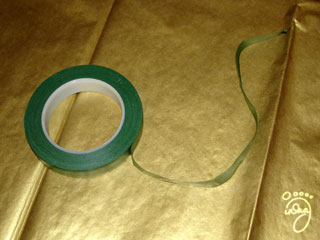 |
28. Tear off about 6 inches of floral tape. |
 |
29. Pull the floral tape taut in order to make it sticky. Very tightly wrap the floral tape around the wire 1 - 2 inches immediately beneath the flower. |
 |
For best results, make sure the build-up of floral tape is a bit fatter right beneath the flower so that the calyx stays in place. |
 |
30. Push the calyx up against the bottom of the flower. Use about 12 more inches of floral tape to secure the calyx and finish wrapping the rest of the wire. If desired, use more floral tape to secure some leaves to the stem. |
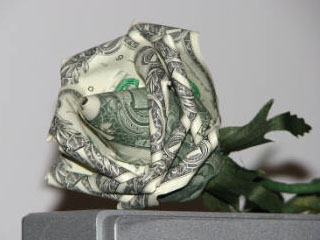
Canada Money Rose
U.S.A. Money Rose